Dragon-Arm One
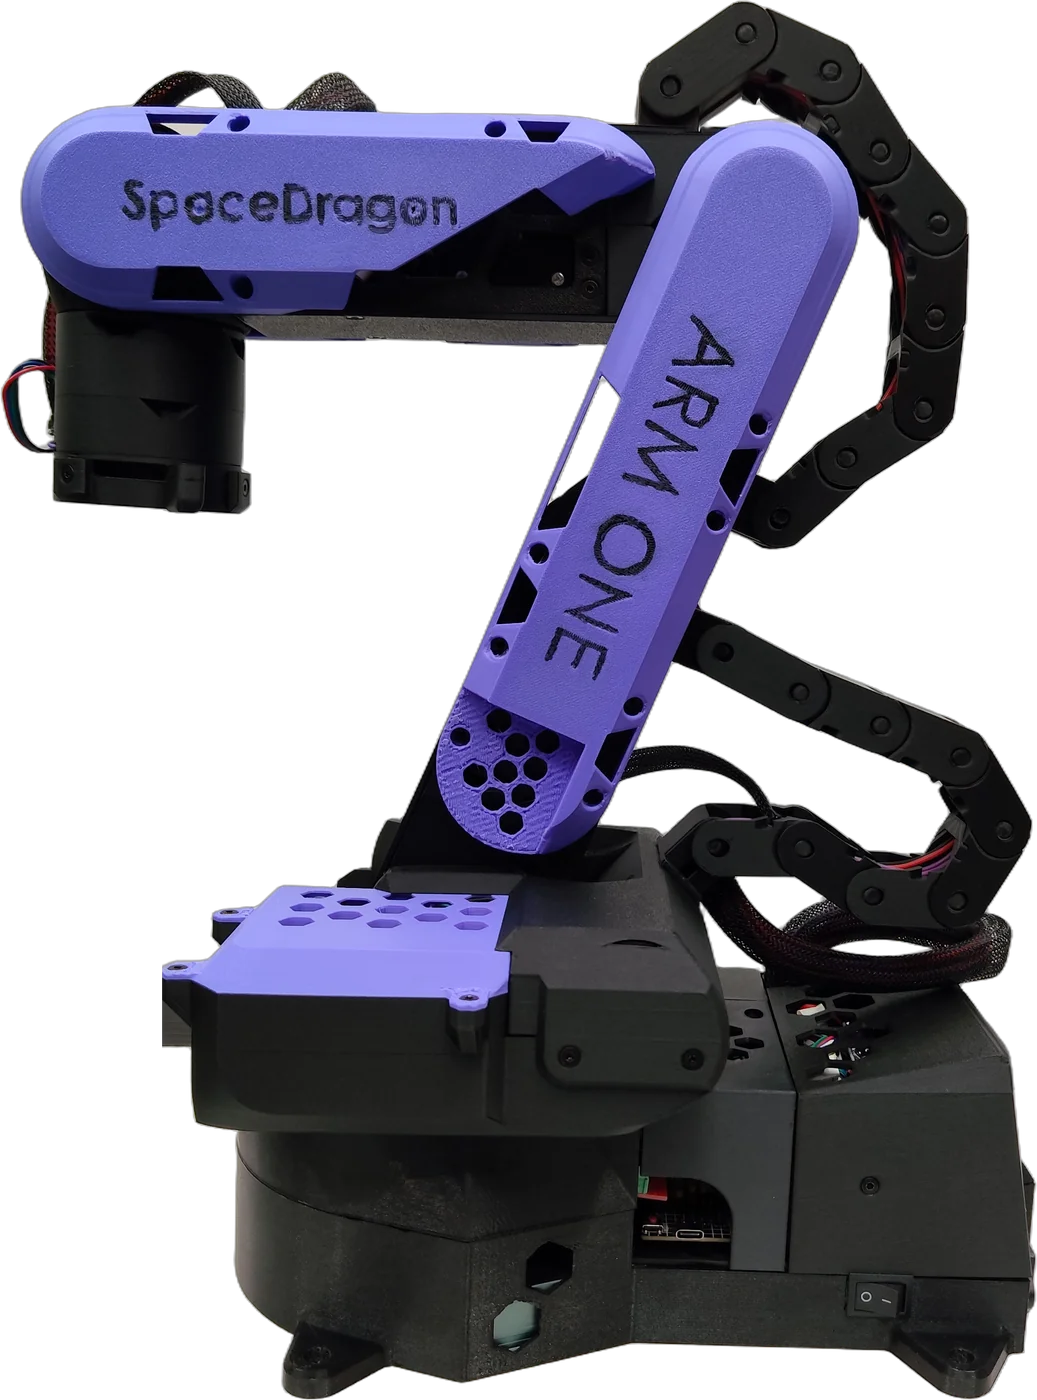
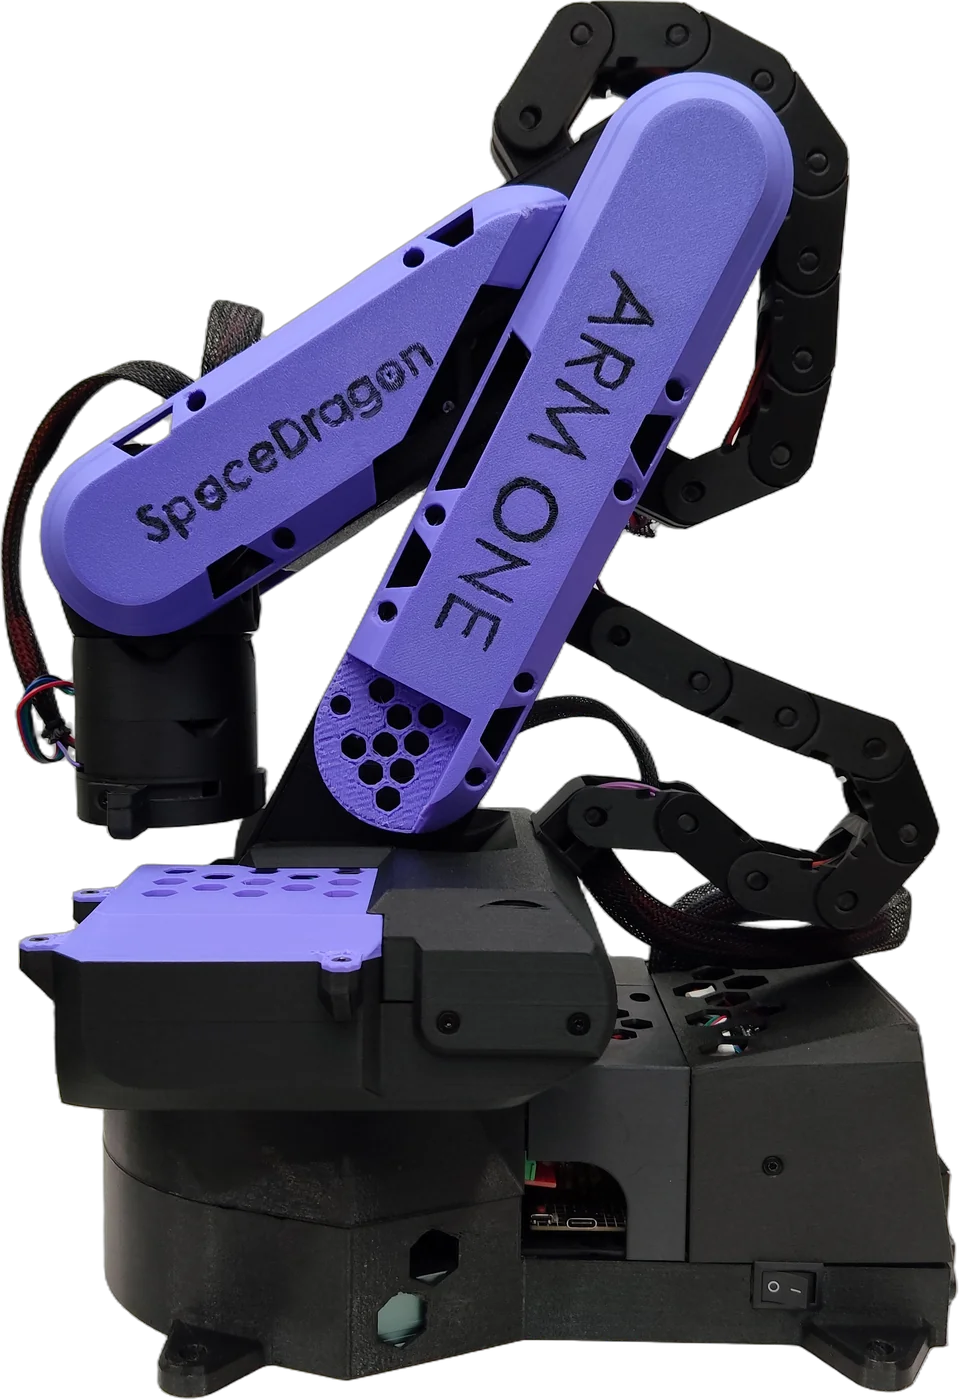
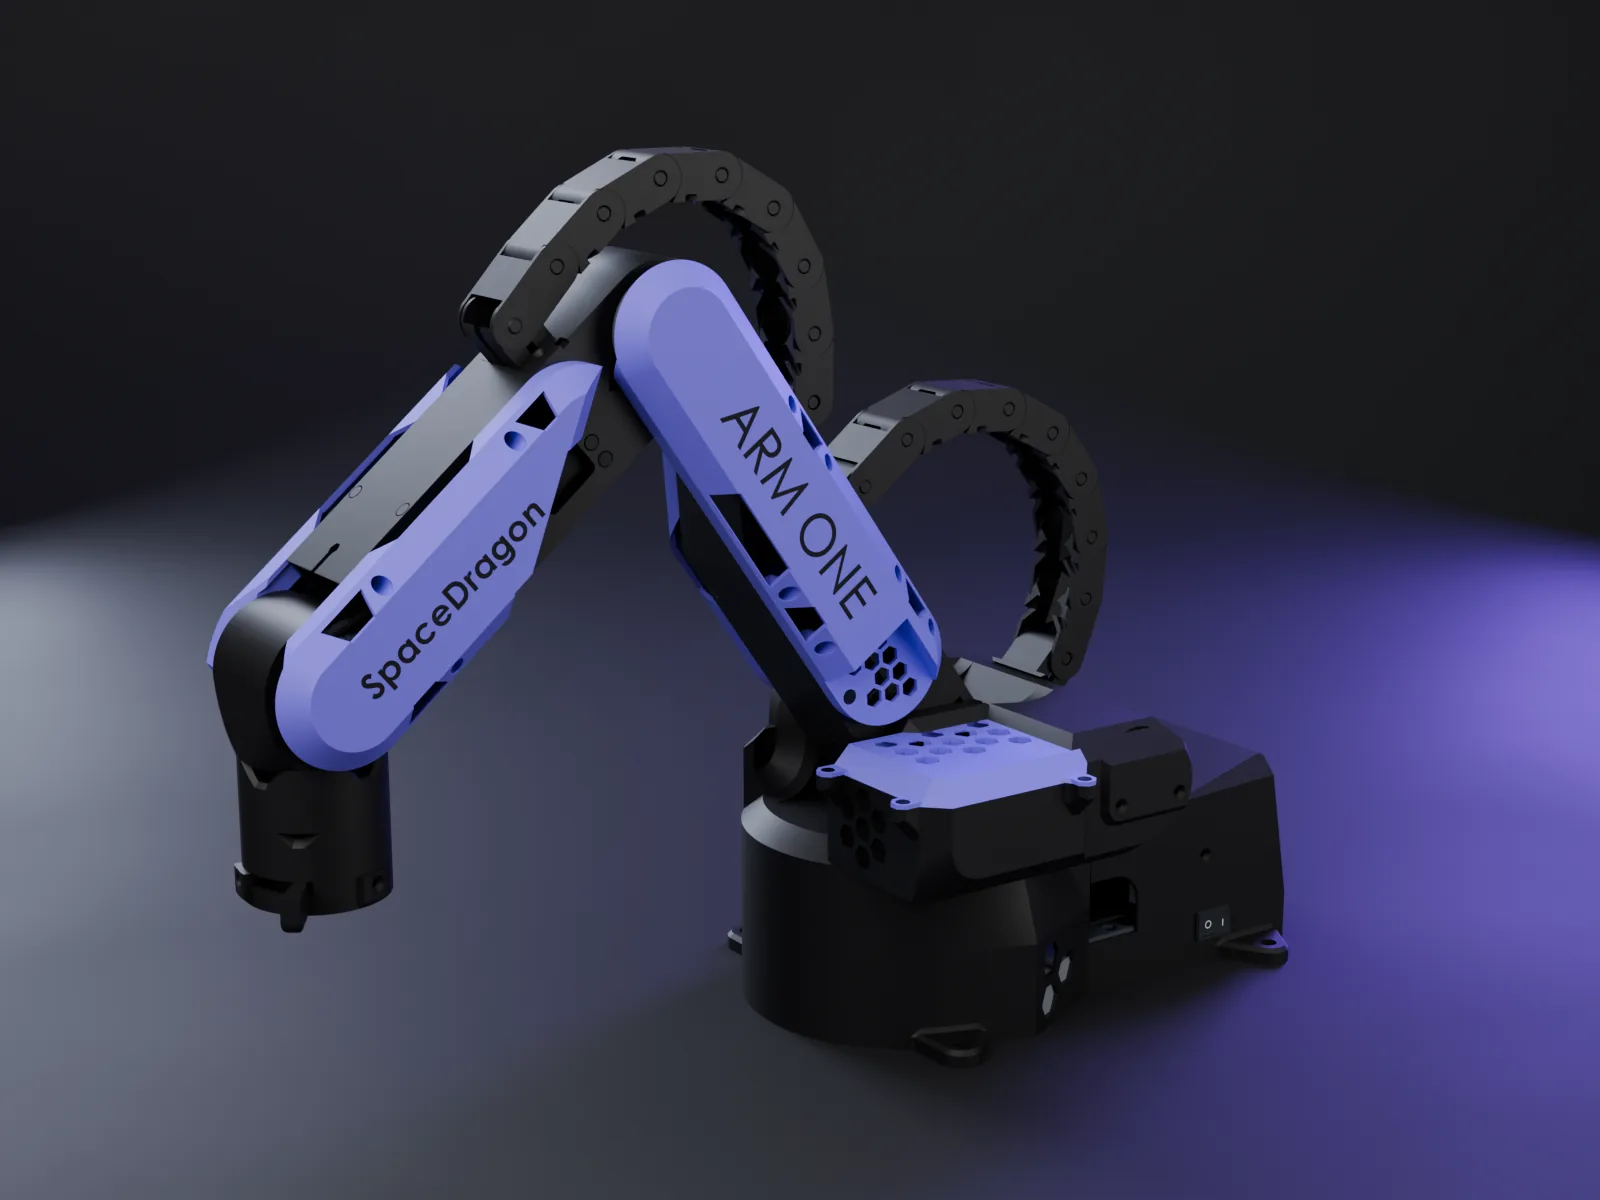
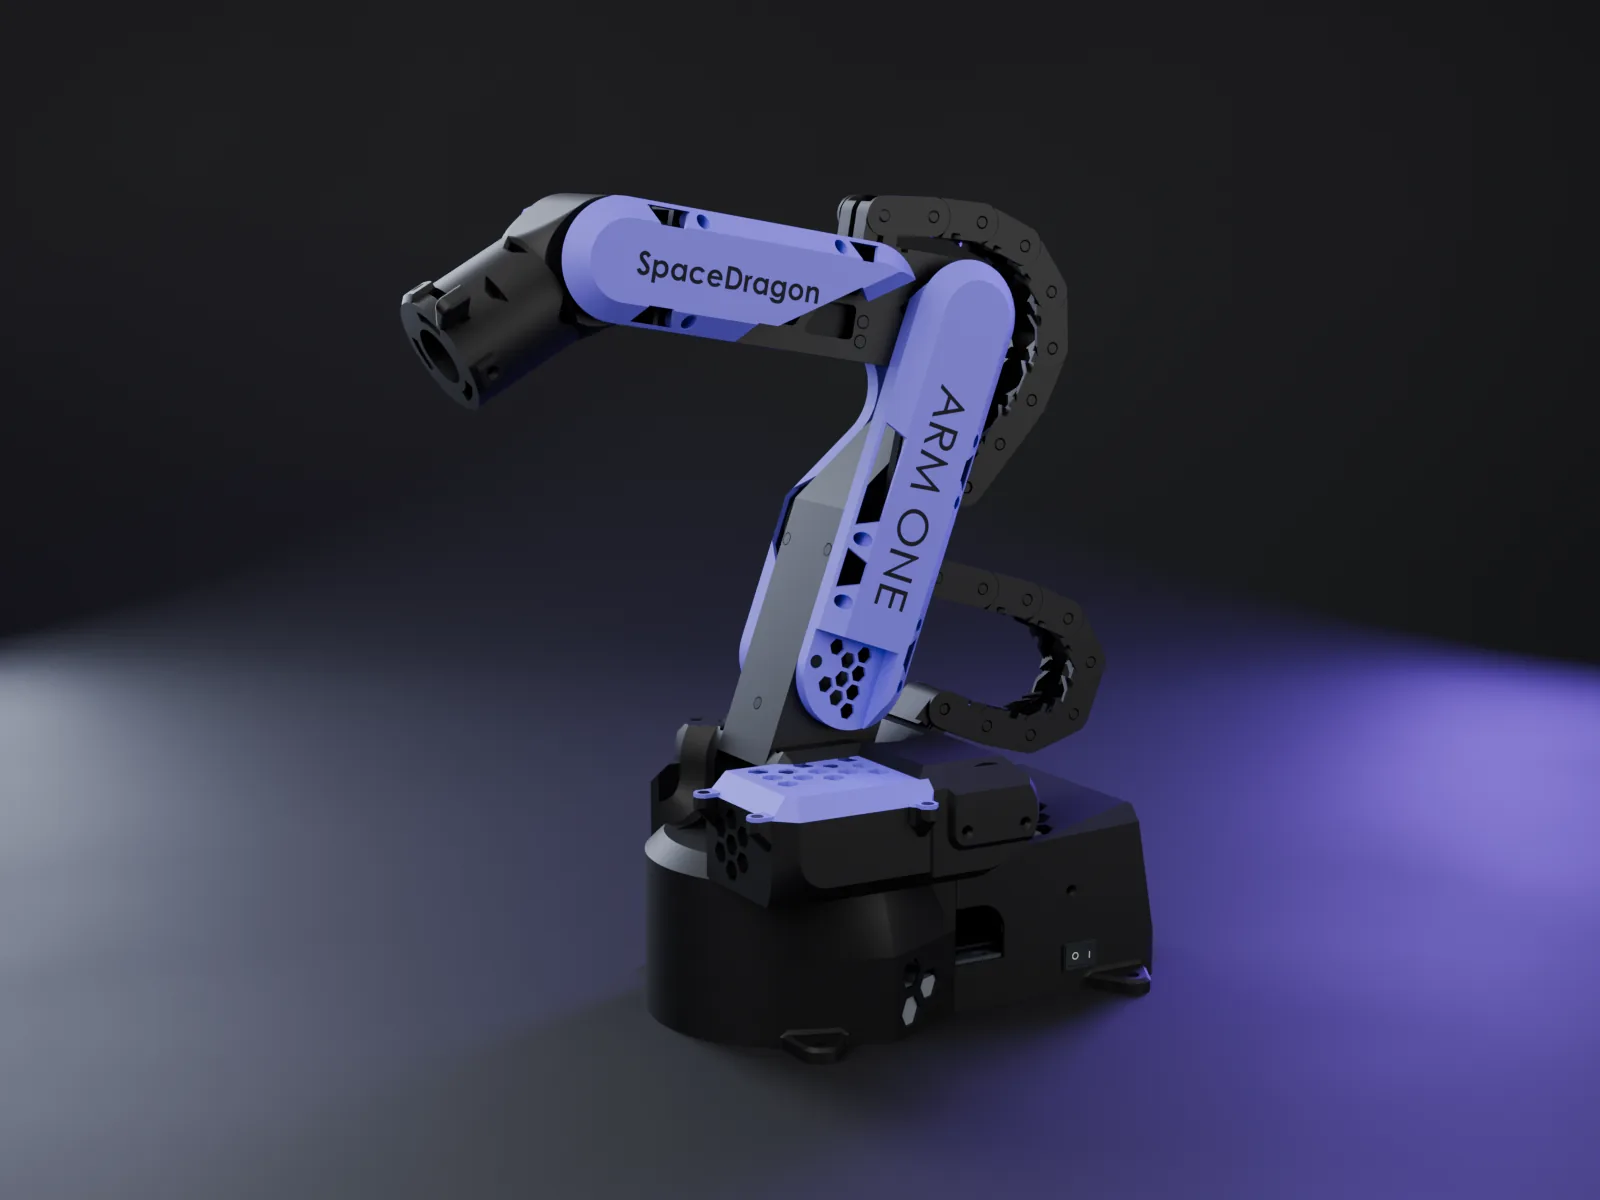
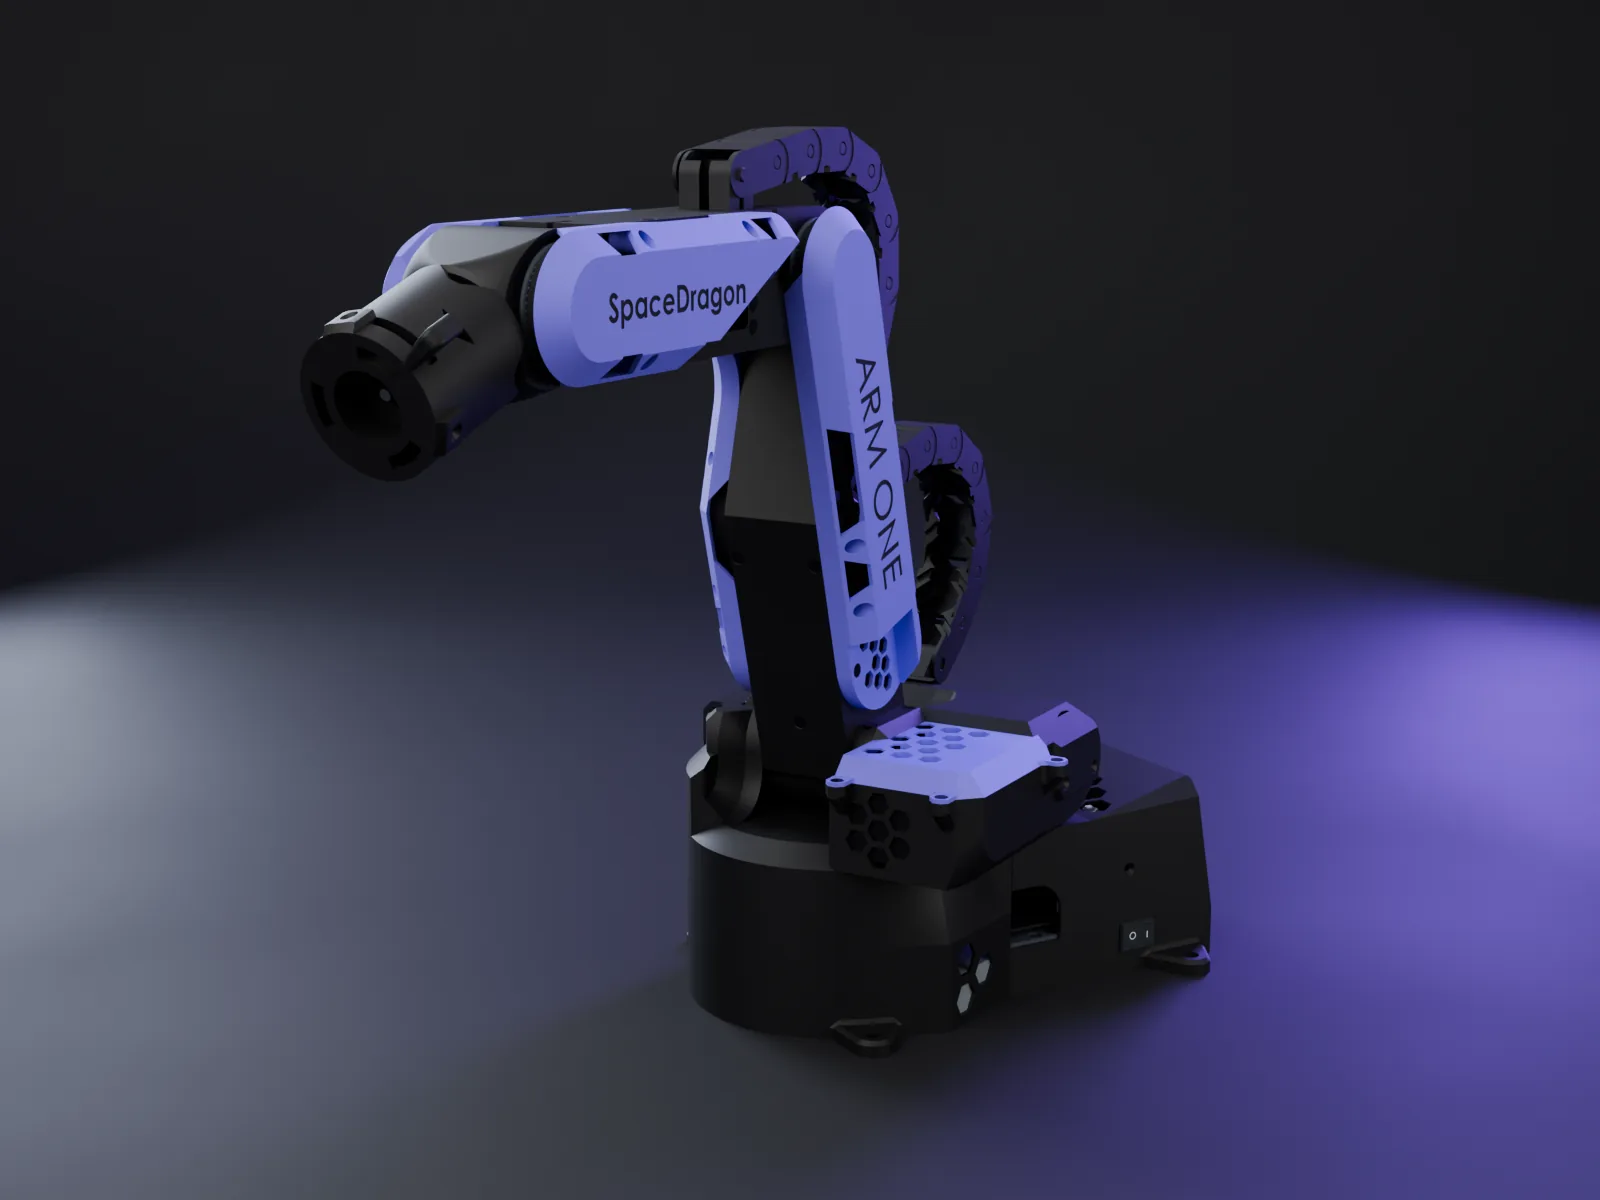
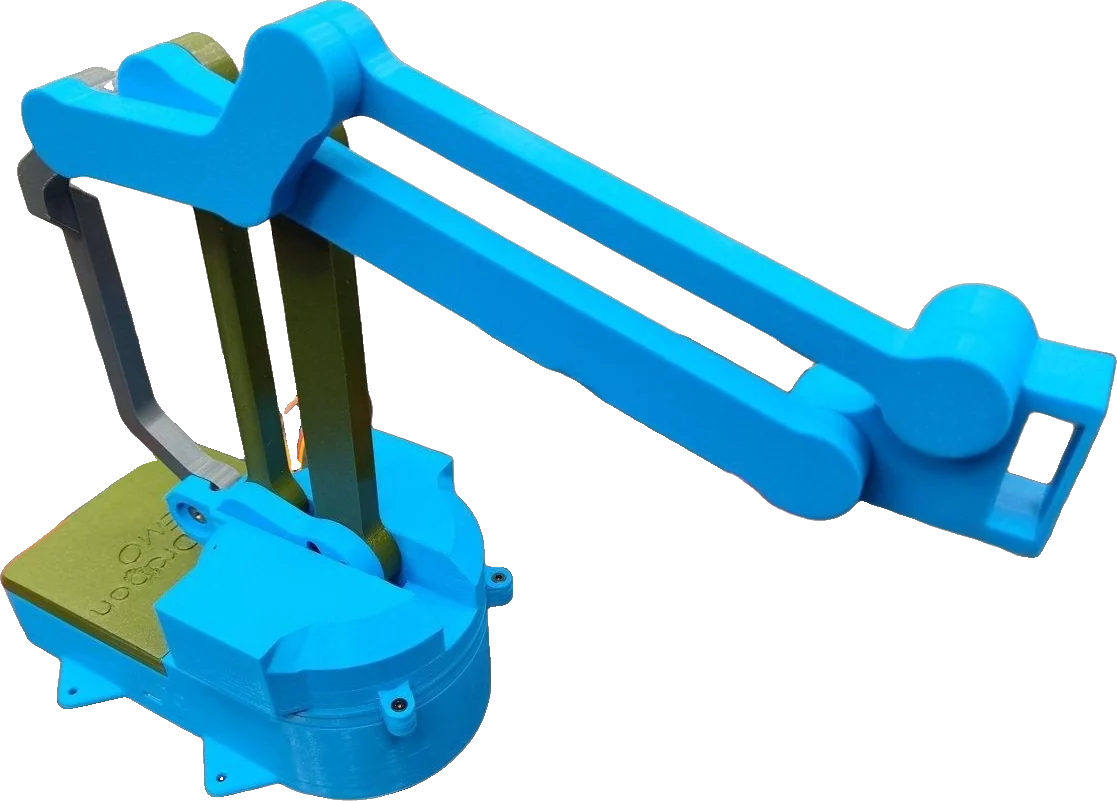
A 5-axis desktop robotic arm you print and build yourself for about €200, from standard parts you can reuse. Absolute encoders on every joint mean no homing, and the free Dragon-Arm Programmer app turns moves into Arduino code.
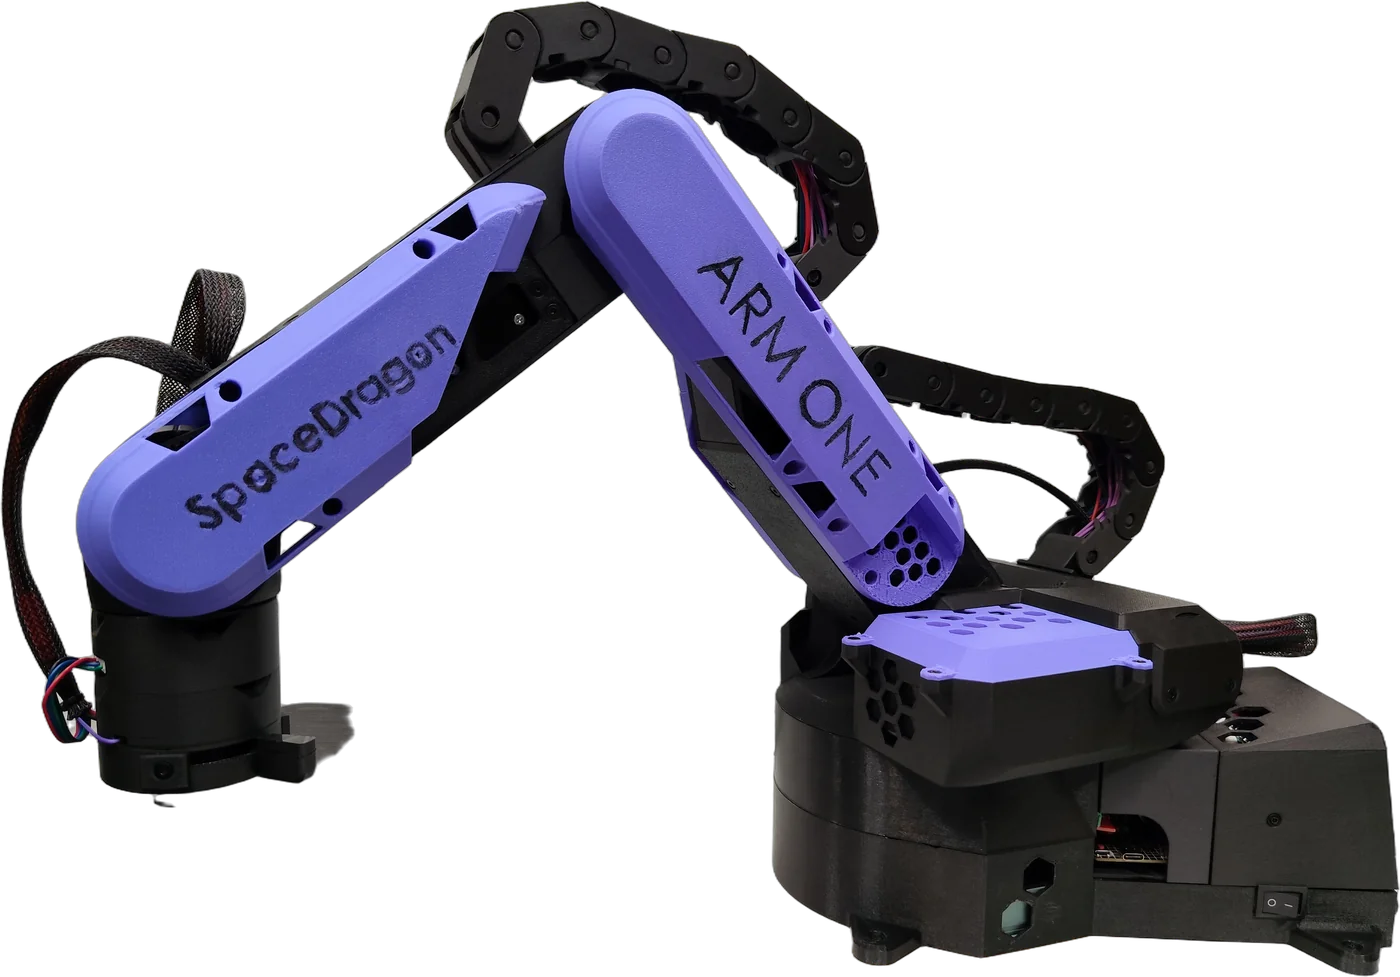
Seven reasons to build it
Price
About €200 for the whole arm: printed structure, NEMA 17 steppers, TMC2209 drivers and an Arduino.
Details →APPProgrammer app
Plan moves with command blocks or by animating a 3D model. The app writes the Arduino code.
Details →STDUniversal components
NEMA 17, StepStick drivers, Arduino UNO, HTD belts, M3 hardware. Parts you may already own, and can reuse later.
Details →0No homing
MT6701 absolute encoders on every axis. The arm knows its joint angles the moment it powers on.
Details →Ø60Dragon-Claws quick mount
Tools fit a Ø60 mm plate that clips onto the claws on Axis 5. Swap tools without rewiring.
Details →AINative AI capability
Run it from an Arduino UNO Q: real-time control plus an on-board Linux computer for Python, vision and AI.
Details →OPENTruly open source
Wiring, pin map, driver registers and kinematics are all published. Use the app or write your own code.
Details →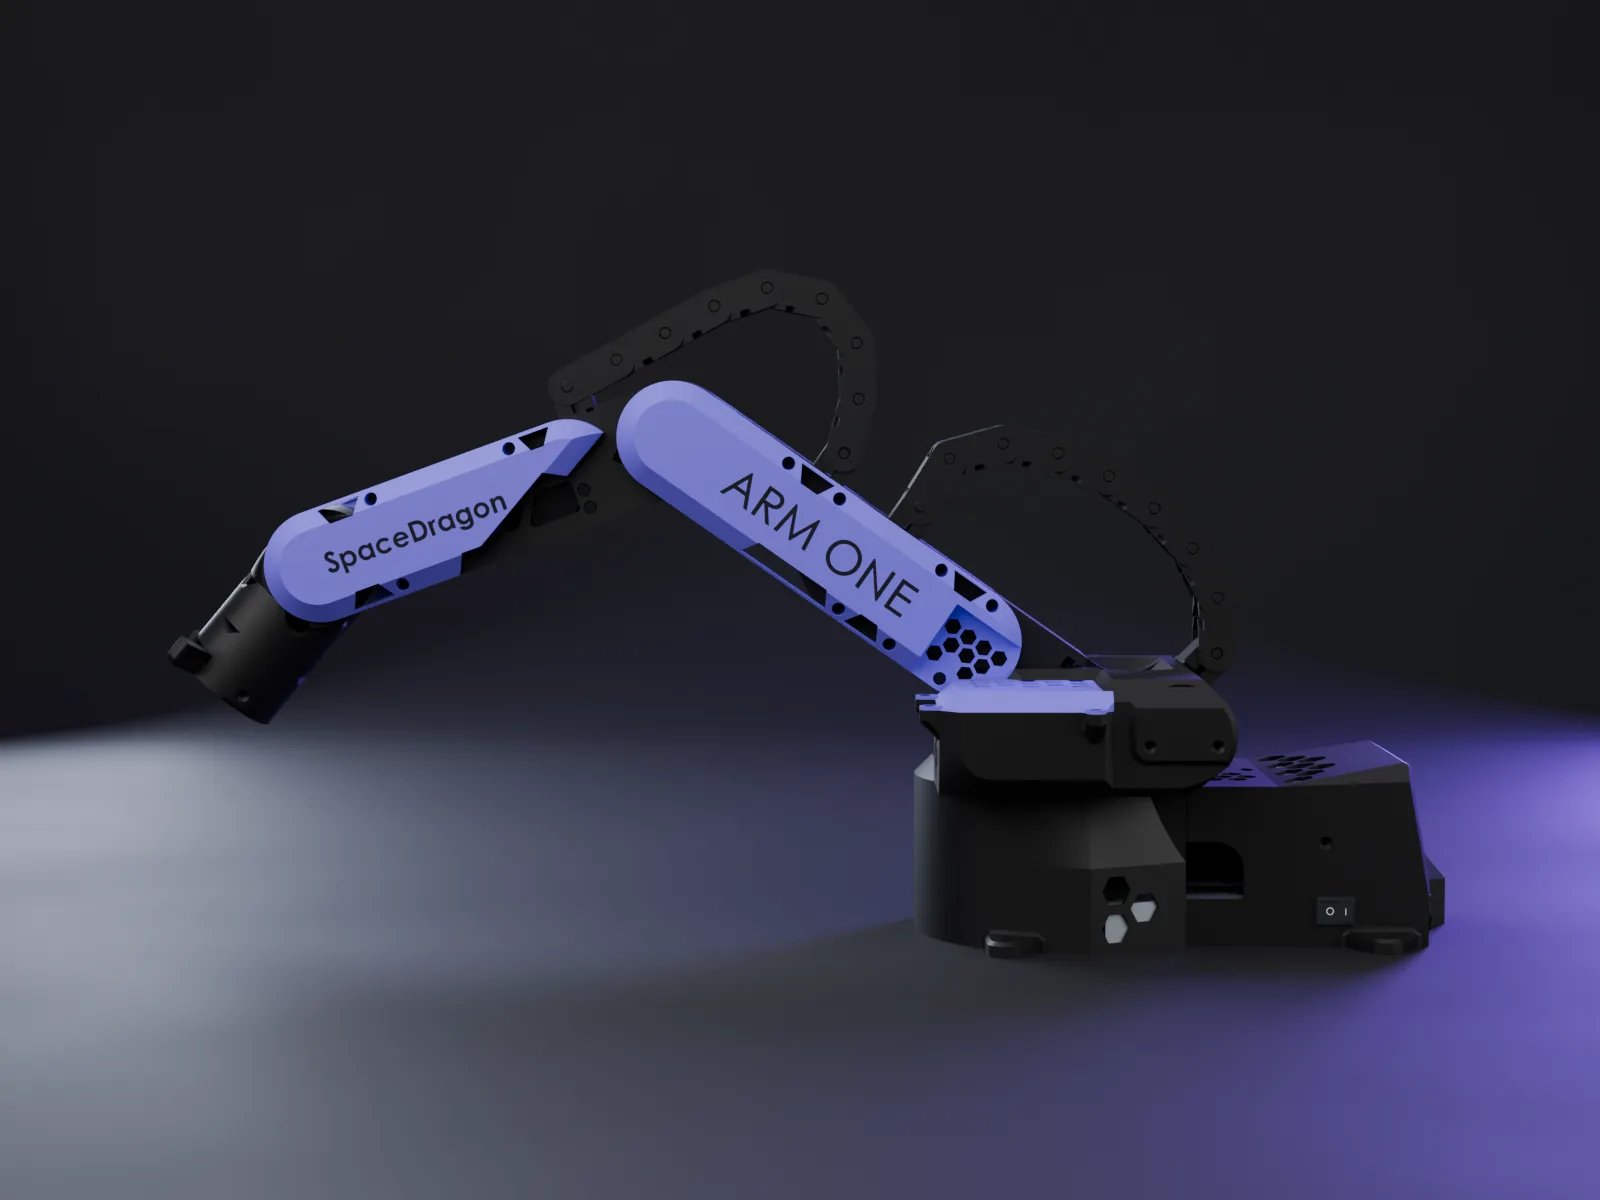
About €200, built from parts you can reuse
Dragon-Arm One is built from standard, widely available parts instead of custom electronics. If you already own NEMA 17 motors, StepStick drivers or an Arduino UNO, you can use them. And when you move on to your next project, every part can be reused.
- Motors: standard NEMA 17 steppers in three lengths
- Drivers: TMC2209 StepStick modules (or compatible) on a driver carrier board
- Controller: Arduino UNO R4 or UNO Q (screw shield recommended)
- Mechanics: HTD 3M and GT2 belts, standard bearings, M3 inserts and screws
- Structure: fully 3D-printable, about 2 kg of filament, fits a 200 × 200 mm bed
Components
| Controller | 1 × Arduino UNO R4 or UNO Q |
|---|---|
| Stepper drivers | 6 × TMC2209 StepStick (or compatible) |
| Stepper motors (NEMA 17) | 2 × 38 mm (≥ 42 N·cm), 3 × 48 mm (≥ 59 N·cm), 1 × 26 mm (≥ 12 N·cm) |
| Encoders (optional) | 5 × MT6701 |
| Bearings | 22 × 15 × 24 × 5 mm |
| Belts | HTD 3M, 4–10 mm wide: 7 × 225 mm, 1 × 348 mm. GT2, 2–6 mm wide: 1 × 150 mm |
| Power supply | 12–36 V DC, ≥ 9 A (24 V recommended) |
| Power switch | 1 × power entry + switch |
| Fan | 1 × 60 × 60 × 10 mm |
| Hardware | > 50 × M3 threaded inserts, > 50 × M3 × 8 mm countersunk screws |
| Other | Cables, Dupont jumpers, cable sleeves (optional), ~2 kg filament |
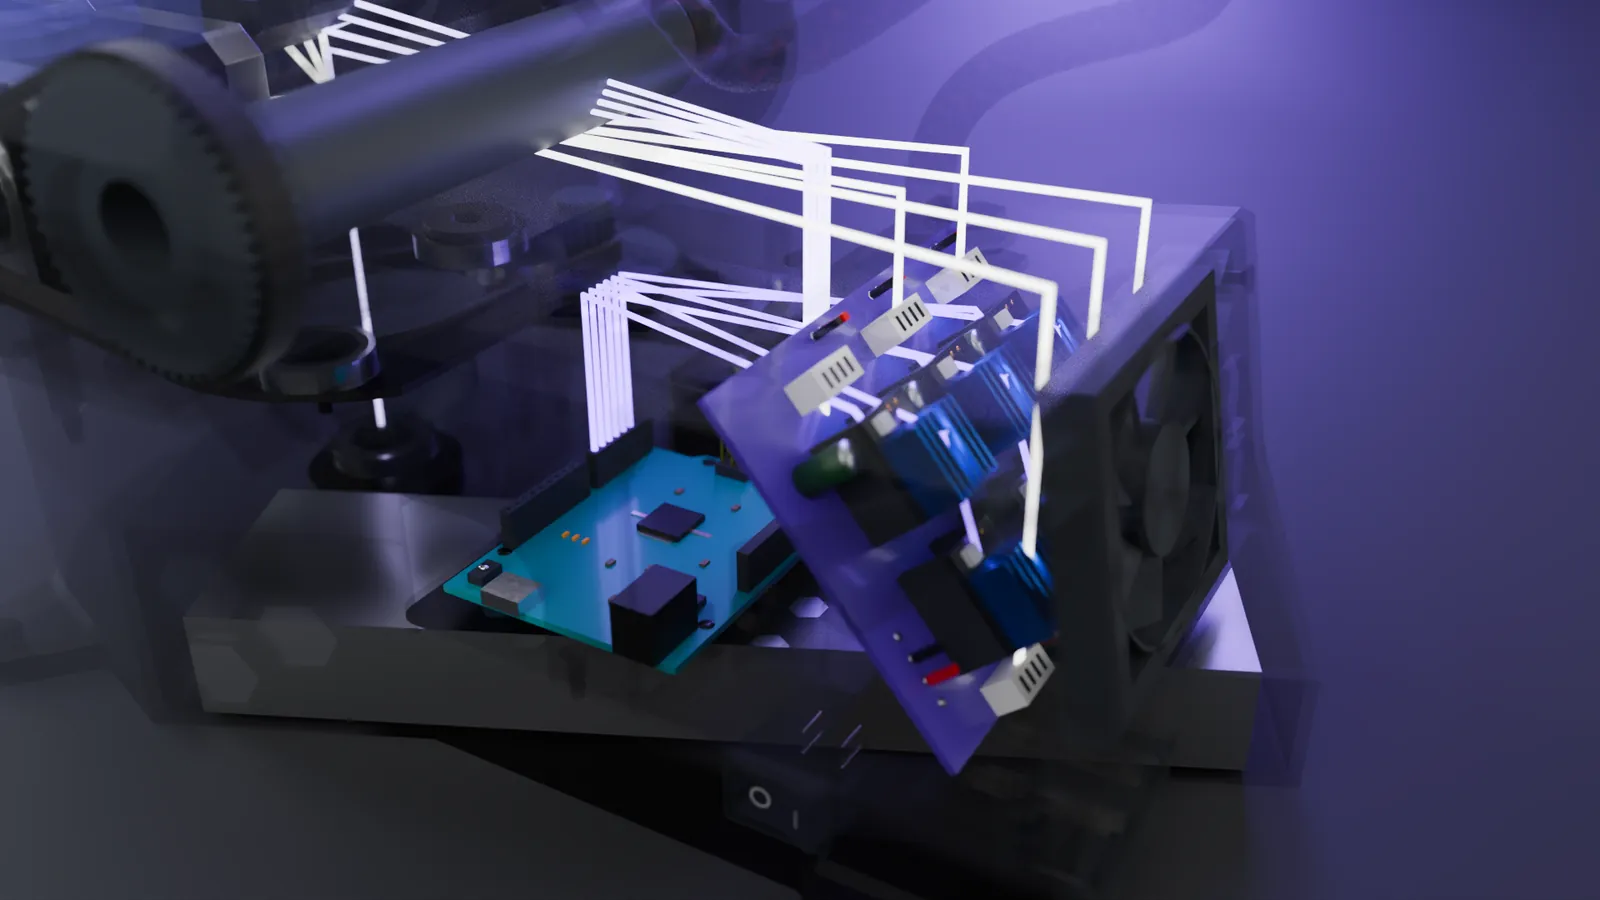
Electronics in the base
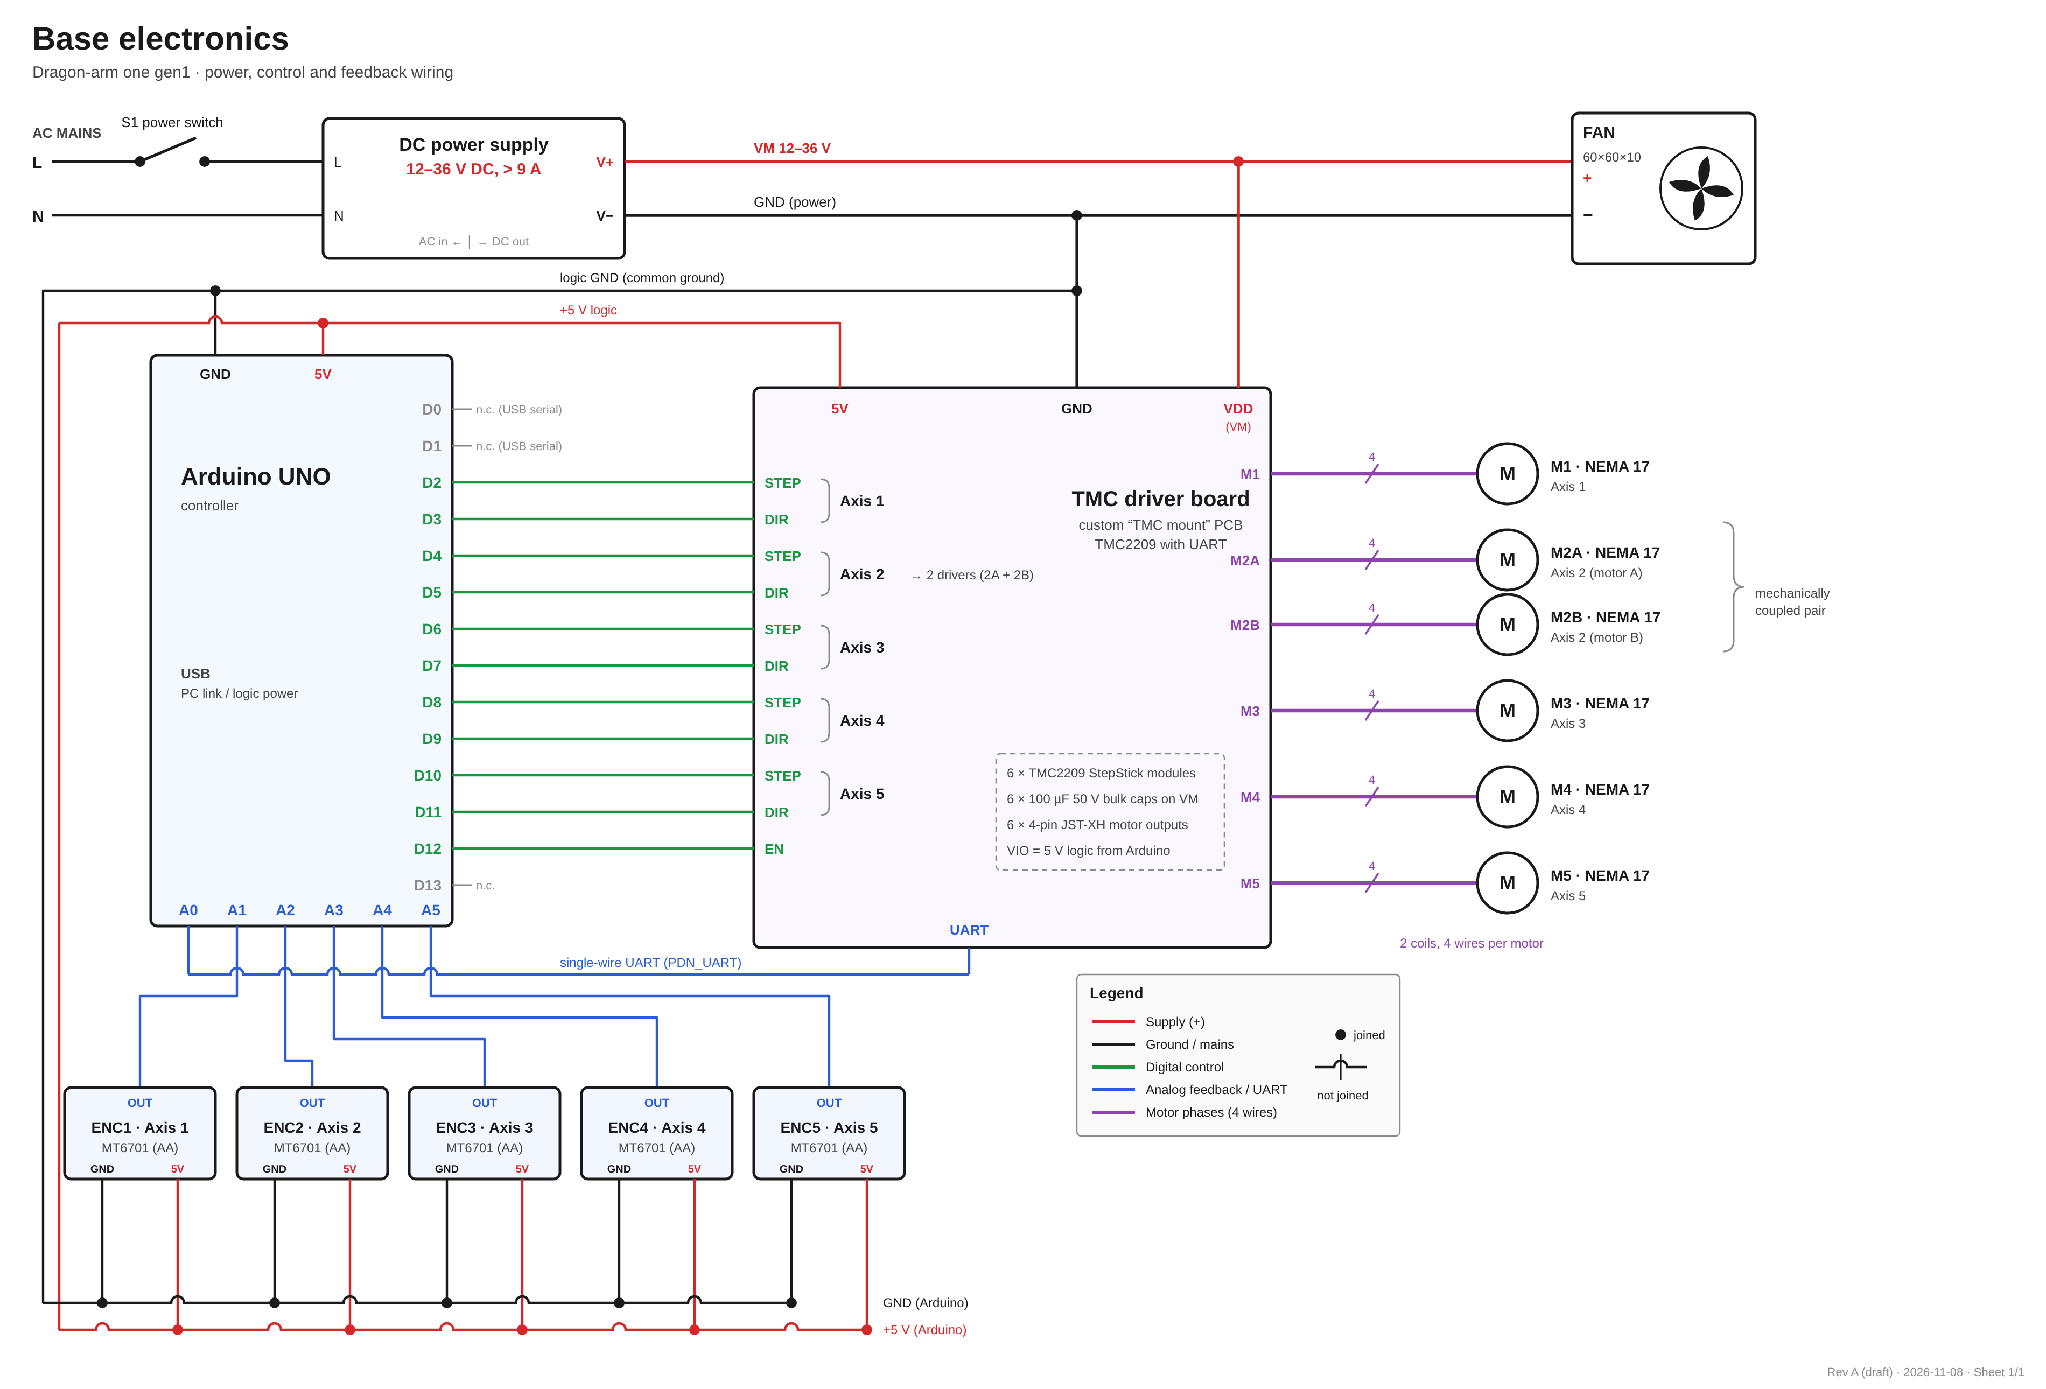
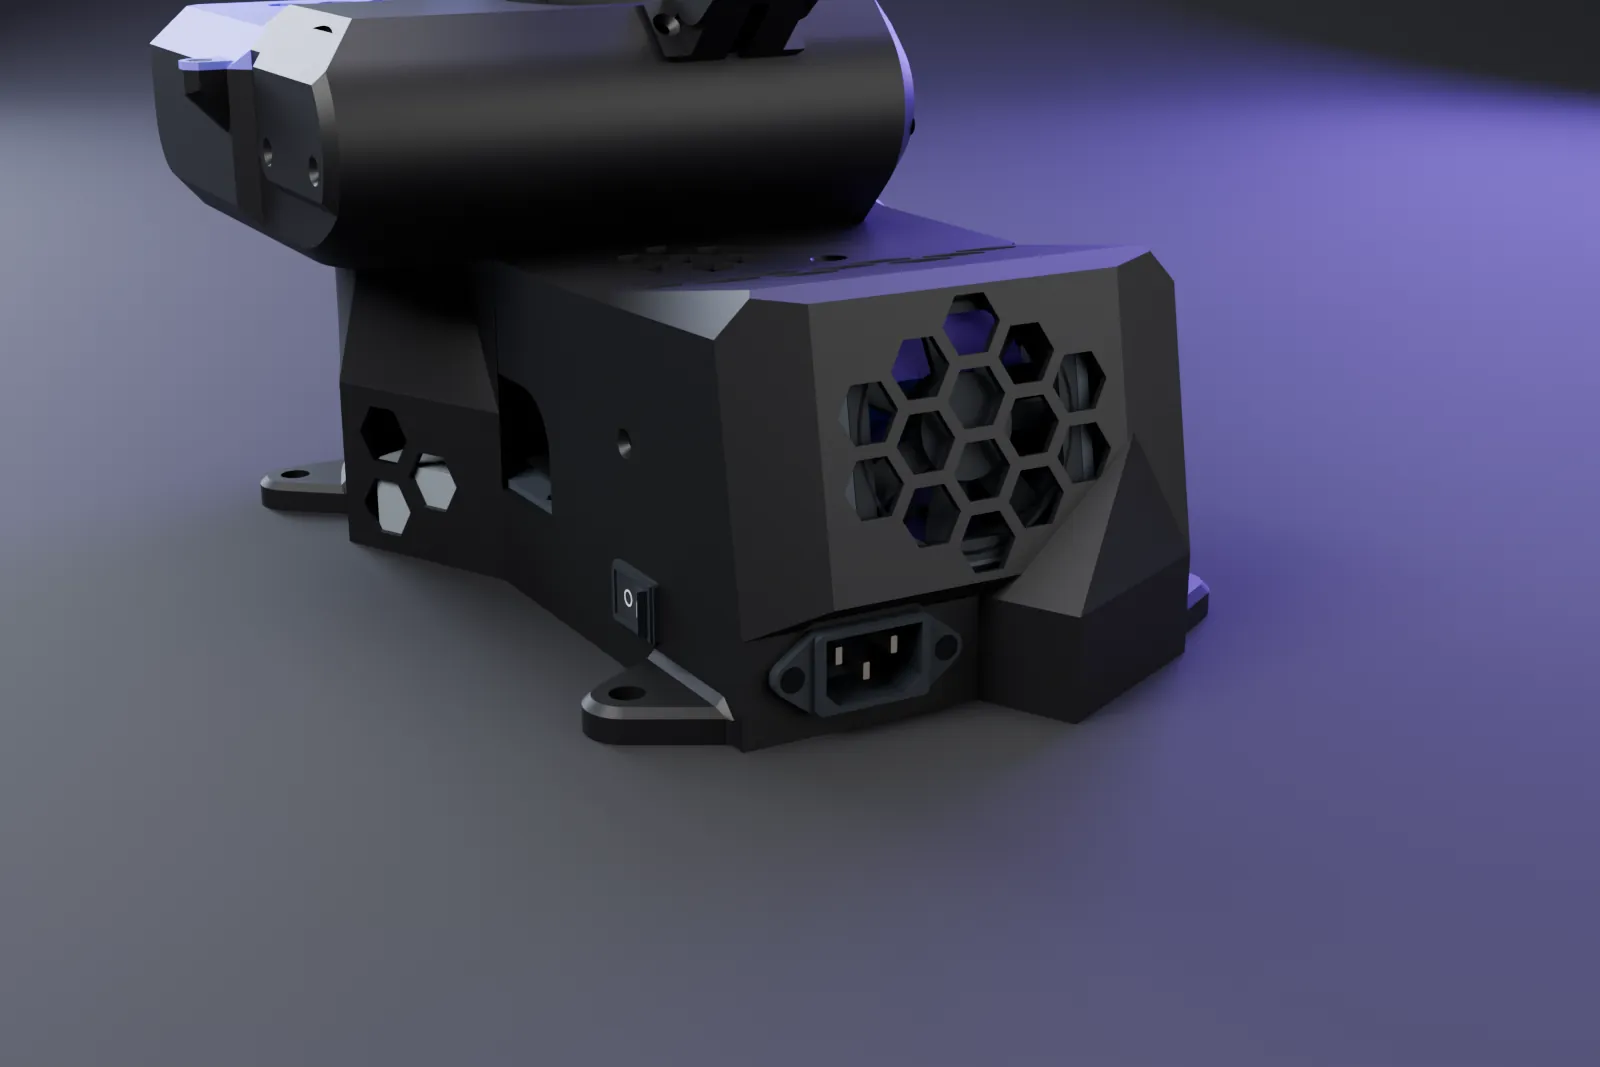
Six TMC2209 drivers take STEP/DIR signals from the Arduino. The shoulder (Axis 2) uses two motors on the same signals. One shared enable line and one shared write-only UART line set the step mode for all drivers. The supply, fan and power switch live inside the base.
| Driver control | STEP/DIR per axis, shared EN (active LOW), shared write-only UART |
|---|---|
| Feedback | MT6701 analog outputs to Arduino A1–A5 |
| Supply | 12–36 V DC, ≥ 9 A; 24 V recommended (built and tested at 24 V) |
Program it with Dragon-Arm Programmer
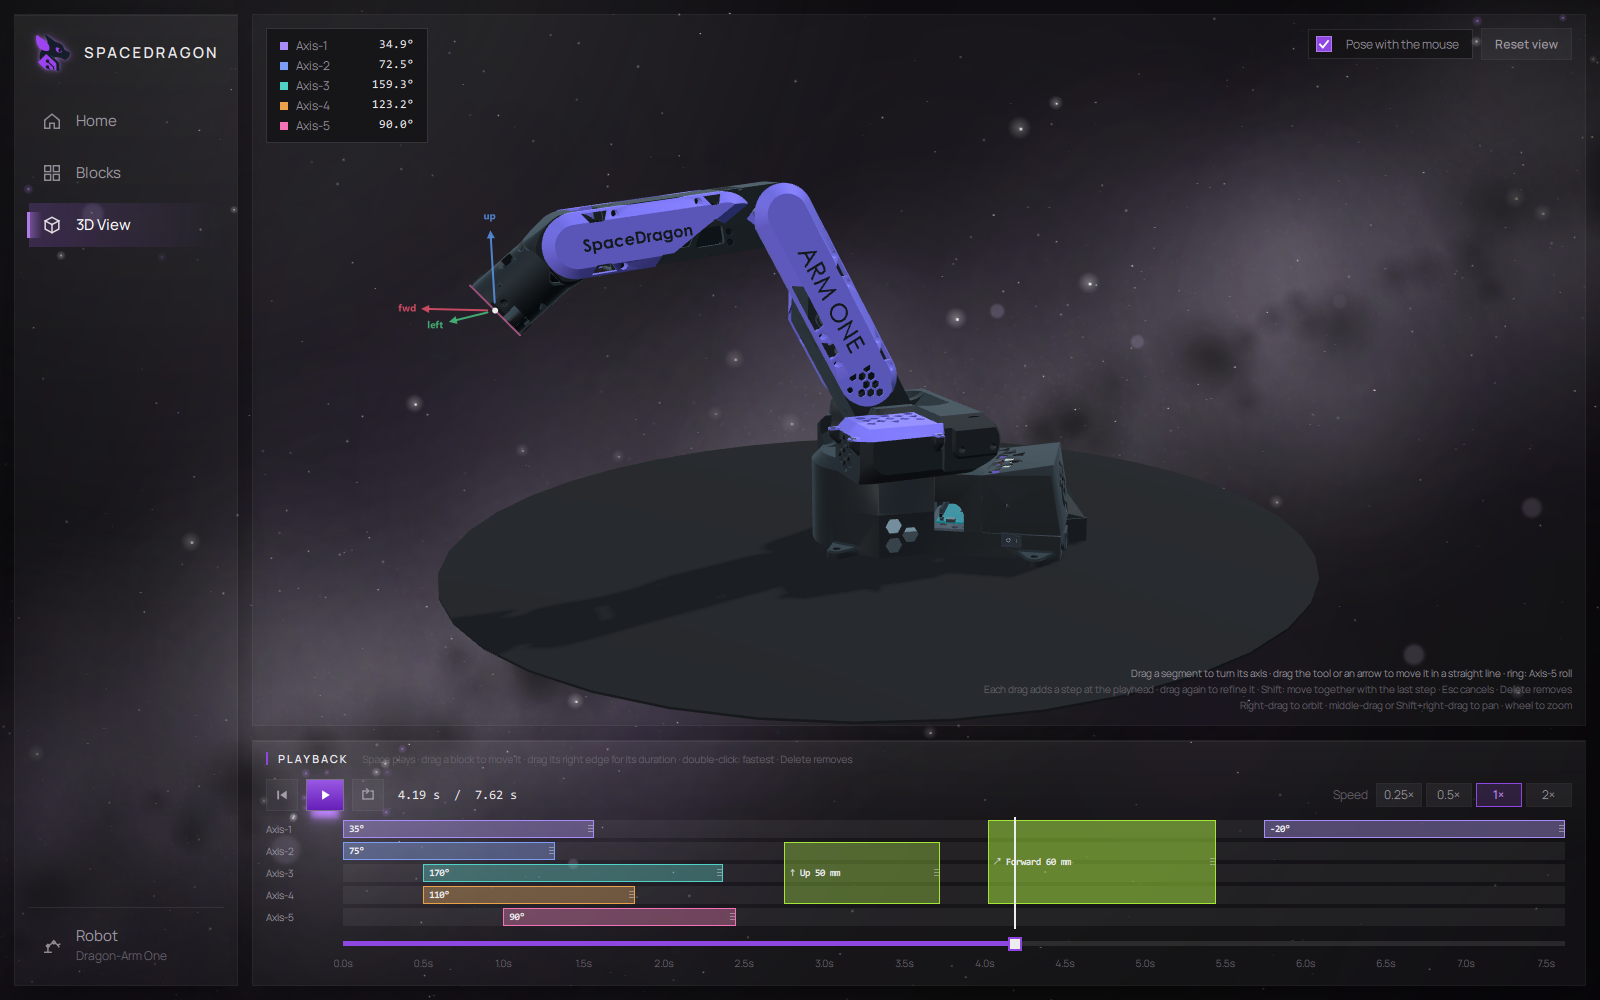
The Dragon-Arm Programmer app is the supported way to program Dragon-Arm One. Plan movements with command blocks or by animating a 3D model of the robot, and the app generates the Arduino code that runs on the arm.
| Motion planning | Command blocks and posing the 3D model with the mouse |
|---|---|
| Tool moves | Straight-line moves in millimetres, solved by inverse kinematics |
| Output | Arduino code, uploaded to the controller over USB |
| Configurable | Axis zero positions, speed and acceleration, encoder offsets, direction check mode |
| Diagnostics | Code option that prints encoder angles to the serial monitor |
| Encoders | Required for use with the app |
Knows where it is the moment it powers on
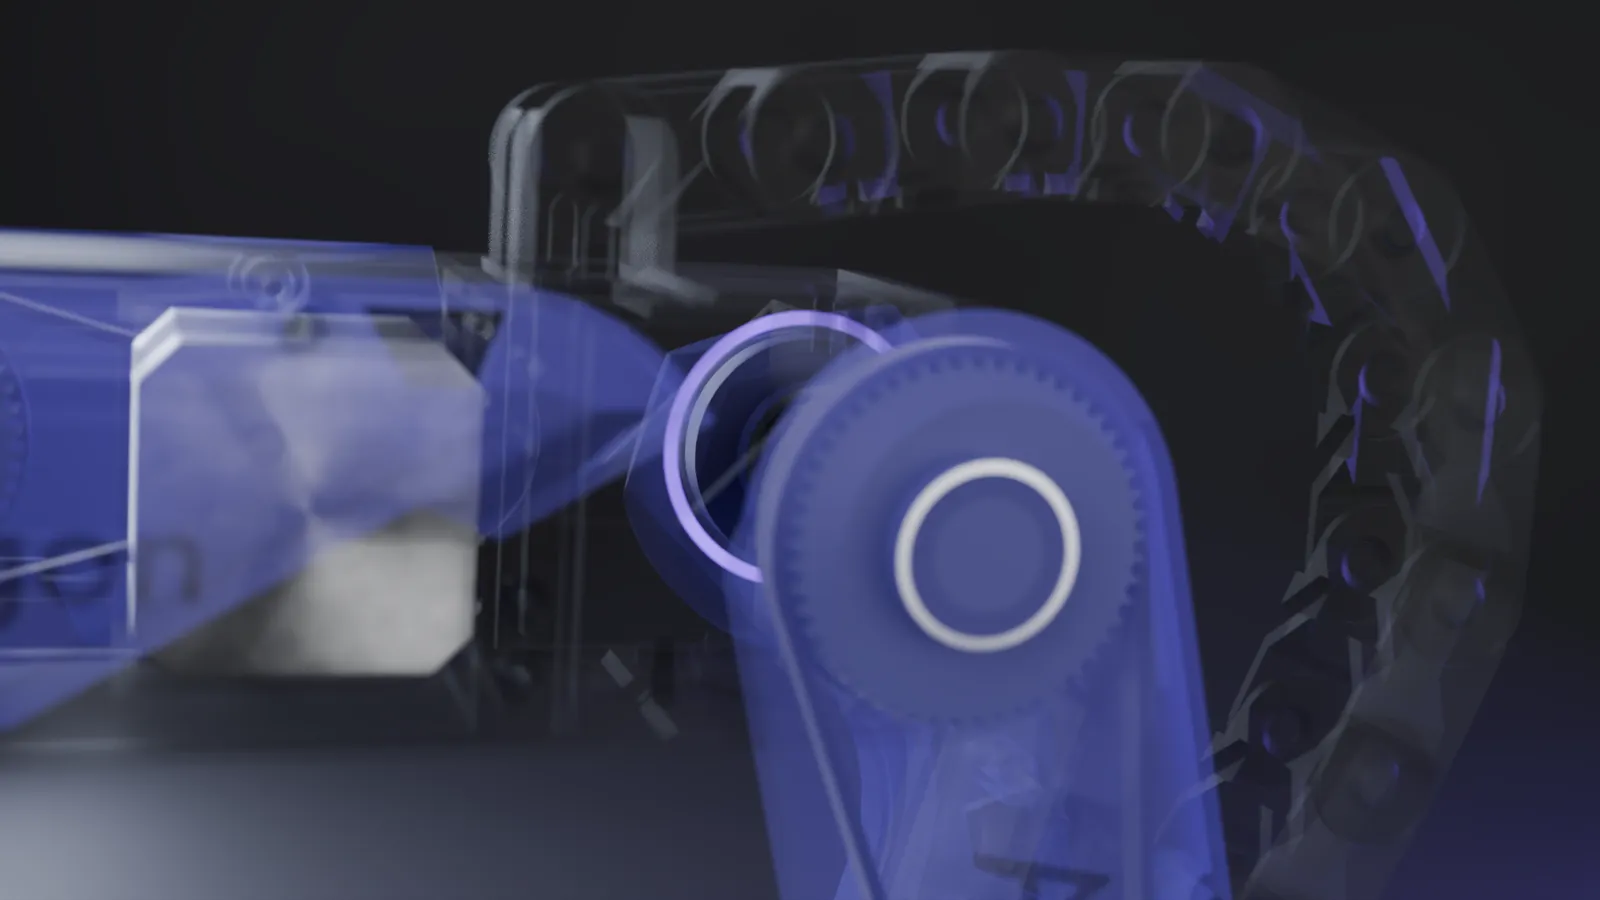
Typical stepper arms lose their position at power-off and need limit switches and a homing move before every session. Dragon-Arm One reads an MT6701 absolute magnetic encoder on each axis, so it always knows its joint angles and no homing move is needed.
Before closed-loop motion the code only confirms the direction of each motor. You choose when:
- before the program starts (default),
- before each axis moves for the first time, or
- during arm movement.
Each encoder is calibrated with the AA encoder calibrator during assembly. Any remaining constant offset from the encoder board is calibrated in the programmer app.
Quick-mount tools on Axis 5
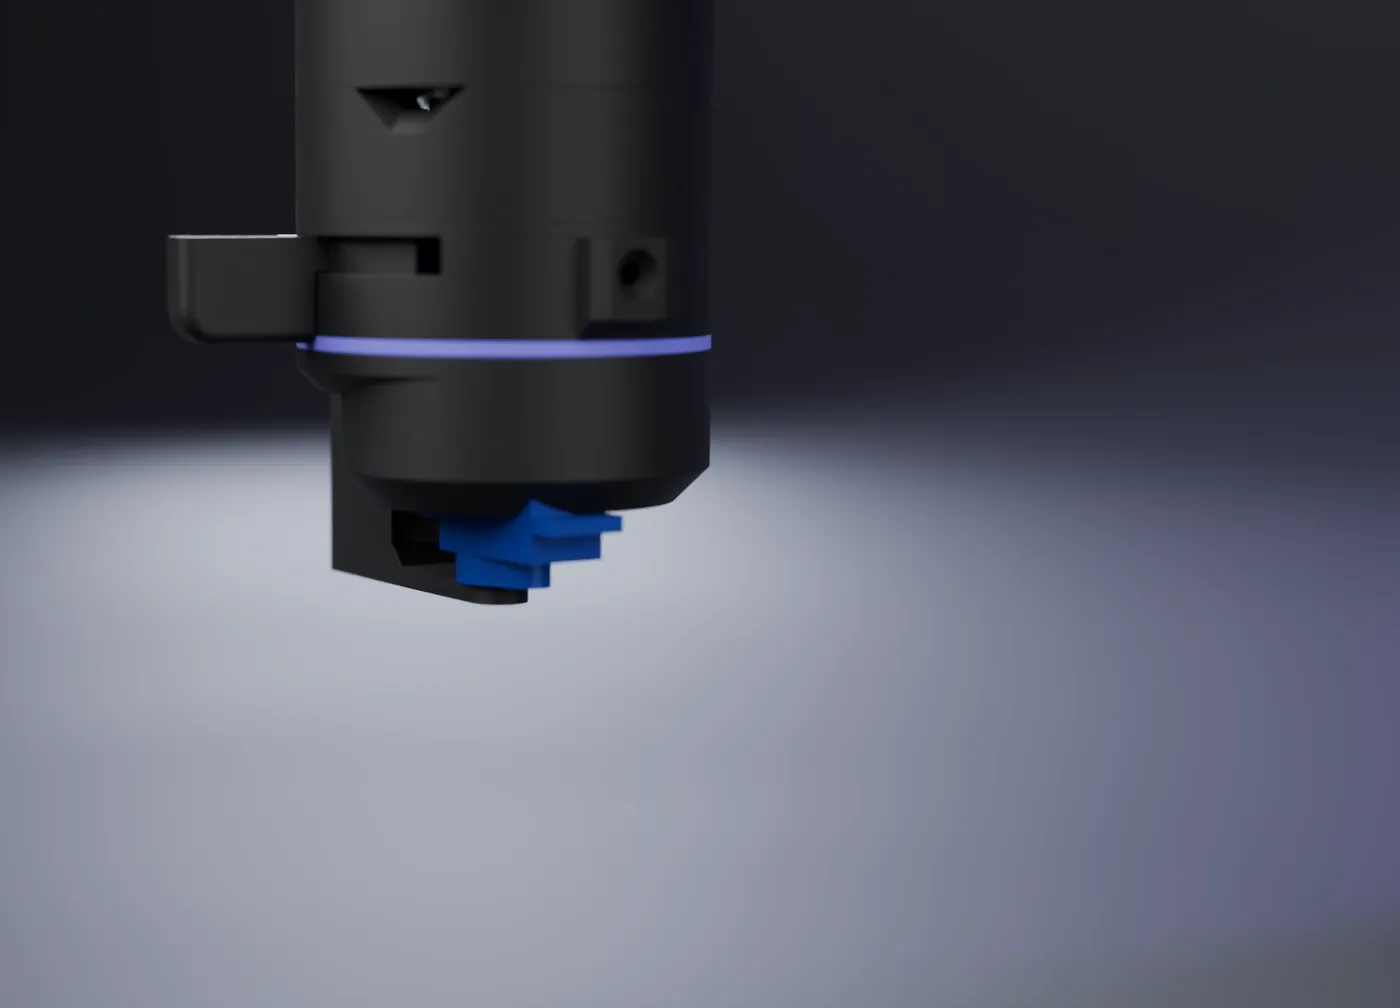
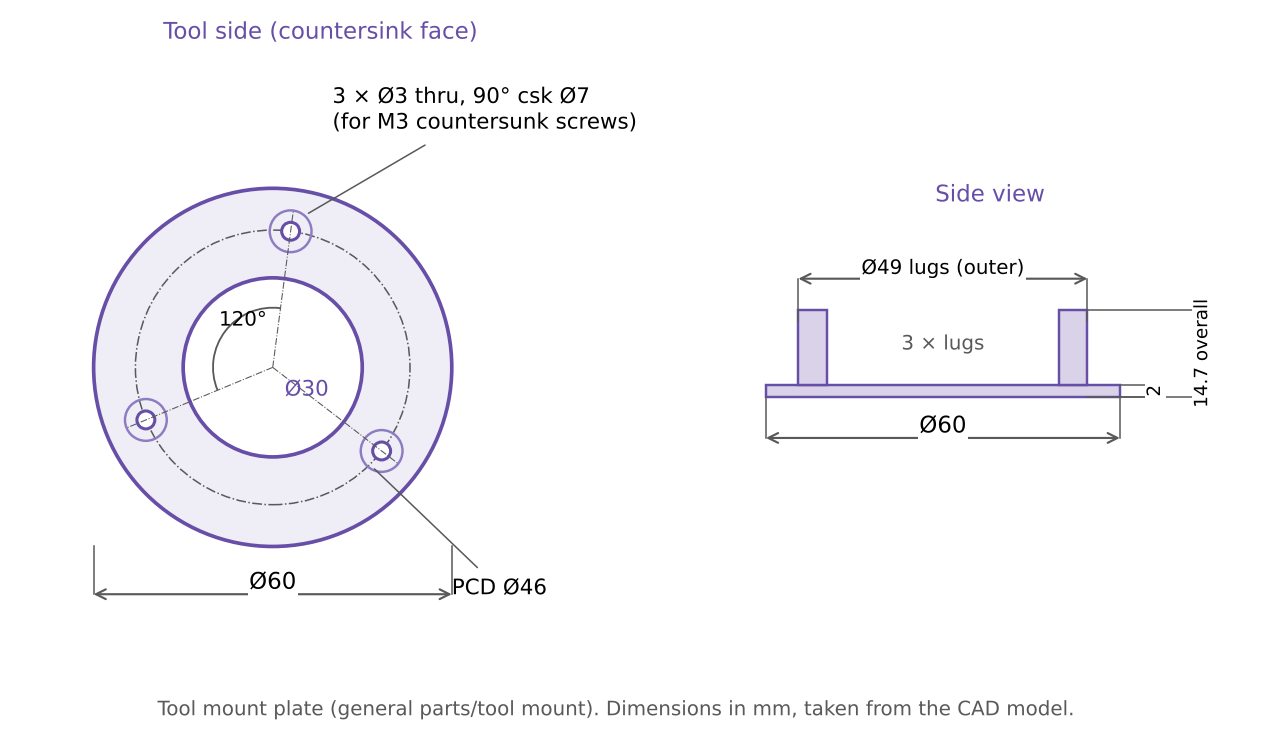
Every tool sits on a standard Ø60 mm tool mount plate that fits the claws on Axis 5. Dragon-Claws is a purely mechanical quick mount: no connectors, nothing to rewire. Build your own tool around the plate and swap it in seconds.
| Interface | Claws tool-mounting system on Axis 5 |
|---|---|
| Tool mount plate | Ø60 mm, 2 mm flange, 14.7 mm overall height, Ø30 mm centre bore |
| Tool fixing holes | 3 × Ø3 mm, 90° countersink Ø7 mm, on a Ø46 mm pitch circle, 120° apart |
Room for AI on the controller
Dragon-Arm One runs on either an Arduino UNO R4 or an Arduino UNO Q. With the UNO Q, the arm's controller is a dual-processor board: a microcontroller for real-time motion, plus a Linux computer on the same board for Python, computer vision and AI.
Motion is commanded in joint angles, and any control method can be implemented in your own code, so the arm is a ready platform for AI and vision experiments without an extra PC in the loop.
Nothing hidden
Everything you need to understand, repair and modify the arm is published: the full wiring, the Arduino pin map, the driver register values, the kinematics and the base mounting pattern. Use the programmer app, or skip it and write your own Arduino code.
| D2 / D3 | STEP / DIR · Axis 1 |
|---|---|
| D4 / D5 | STEP / DIR · Axis 2 (both motors) |
| D6 / D7 | STEP / DIR · Axis 3 |
| D8 / D9 | STEP / DIR · Axis 4 |
| D10 / D11 | STEP / DIR · Axis 5 |
| D12 | EN (active LOW) · all six drivers |
| A0 | UART TX (write-only) · all six drivers |
| A1 – A5 | MT6701 encoders, Axis 1 – Axis 5 |
Gen1 technical data
| Robot type | Stepper-driven articulated arm, belt reduction |
|---|---|
| Degrees of freedom | 5 (base yaw, shoulder, Segment 2, Segment 3, tool roll) |
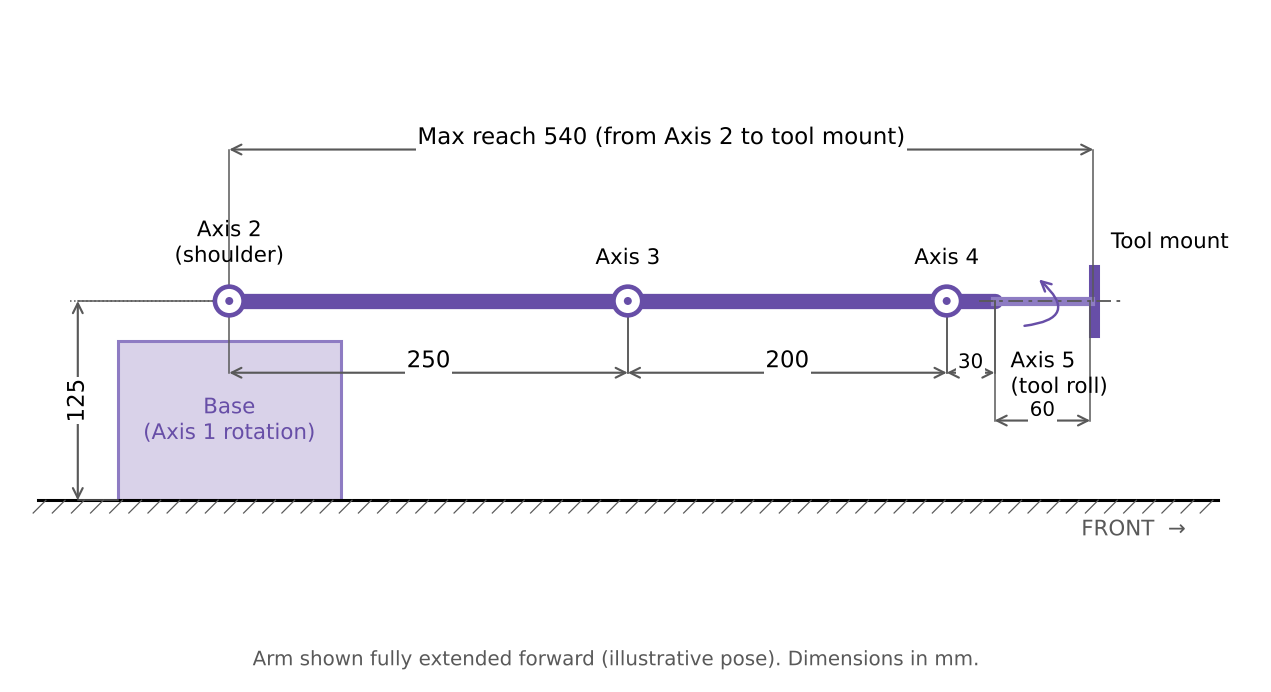
| Maximum reach | 540 mm from Axis 2 to the tool mount |
| Maximum height, arm vertical | ≈ 665 mm to the tool mount |
| Rated payload | 300 g |
| Accuracy | ±3 mm |
| Weight | 4.15 kg |
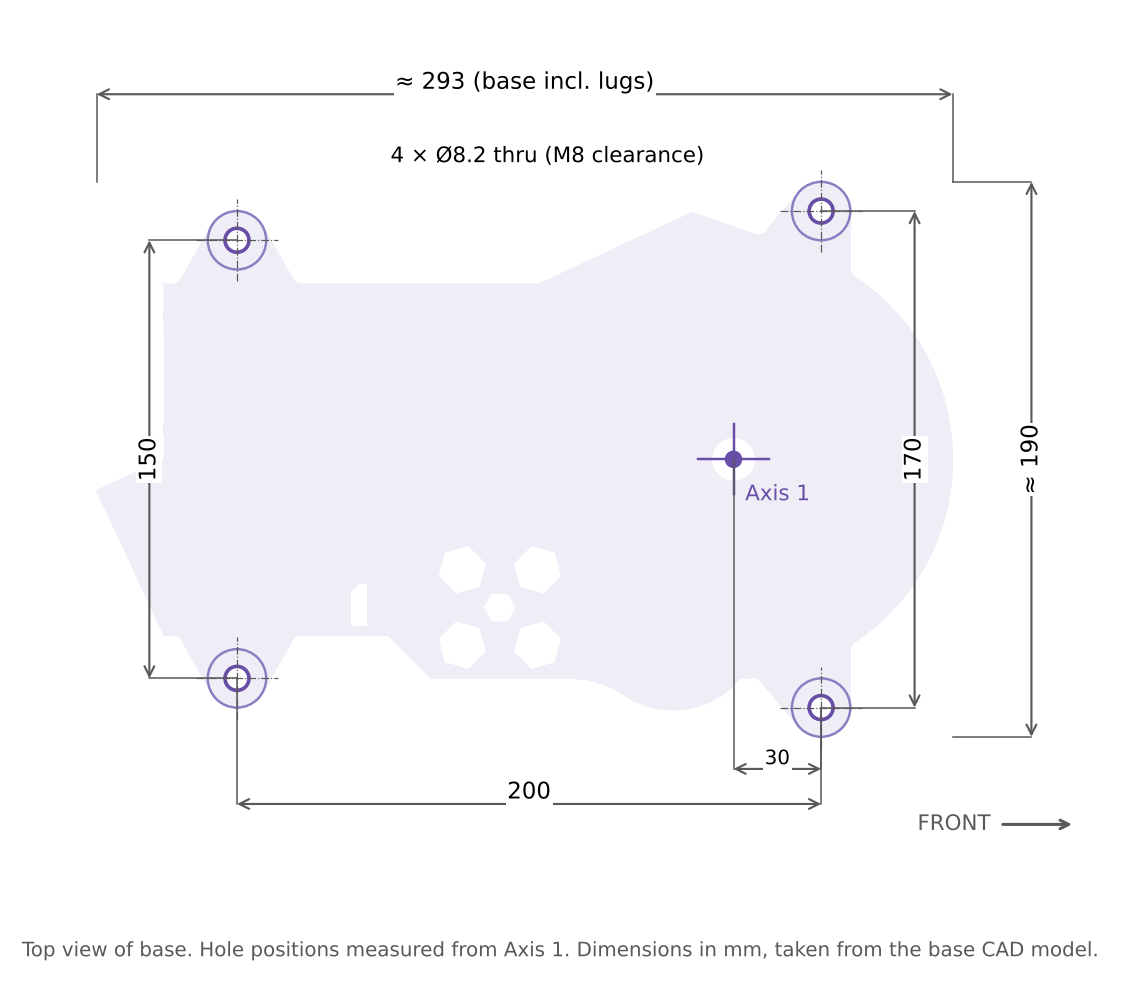
| Base footprint | ≈ 293 × 190 mm including mounting lugs |
| Controller | Arduino UNO R4 or Arduino UNO Q |
| Stepper drivers | 6 × TMC2209 StepStick (or compatible) |
| Position feedback | 5 × MT6701 absolute magnetic encoders, analog (optional; required by the app) |
| Supply | 12–36 V DC, ≥ 9 A (24 V recommended) |
| Environment | Indoor, dry, desktop use; −25 °C to +40 °C |
Accuracy and repeatability depend strongly on your build (print quality, belt tension, driver current) and on the control code.
| Function | Motor | Reduction | Range | |
|---|---|---|---|---|
| Axis 1 | Base rotation (yaw) | NEMA 17, 42 N·cm | 9:1 | −150° to +150° |
| Axis 2 | Shoulder (Segment 1) | 2 × NEMA 17, 59 N·cm | 9:1 | 0° to 135° |
| Axis 3 | Segment 2 | NEMA 17, 59 N·cm | 9:1 | 0° to 240° |
| Axis 4 | Segment 3 | NEMA 17, 42 N·cm | 9:1 | 0° to 180° |
| Axis 5 | Tool rotation (roll) | NEMA 17, 12 N·cm | 1:1 (direct) | 0° to 360° |
| Drive (Axes 1–4) | Stepper + two-stage HTD 3M belt reduction, 10 T → 30 T per stage (3:1 × 3:1 = 9:1) |
|---|---|
| Drive (Axis 5) | Direct drive, no reduction |
| Joint resolution at full step | Axes 1–4: 0.2° per step (5 steps/°). Axis 5: 1.8° per step |
| Joint limits | Mechanical limits only, as listed above |
| Zero positions | Defaults as listed in the manual; changed in the programmer app |
| Axis 2 height | 125 mm above mounting surface |
|---|---|
| Segment 1 (Axis 2 → Axis 3) | 250 mm |
| Segment 2 (Axis 3 → Axis 4) | 200 mm |
| Axis 4 → Axis 5 | 30 mm |
| Axis 5 → tool mount | 60 mm |
| Maximum reach | 540 mm (all segments collinear) |
| Reach to tool point | Maximum reach + length of the mounted tool |
| Mounting holes | 4 × Ø8.2 mm M8 through-holes in the base lugs |
|---|---|
| Front hole pair | 30 mm in front of Axis 1, 170 mm apart |
| Rear hole pair | 170 mm behind Axis 1, 150 mm apart |
| Front-to-rear spacing | 200 mm |
| Filament | ~2 kg |
|---|---|
| Printer | Minimum 200 × 200 mm bed. Below 300 × 300 mm the base plate is printed in two parts |
| Standard parts | 0.2 mm layer, 2 walls, 15% infill, 3 top / 3 bottom layers |
| Gears | 5 walls, > 30% gyroid infill, 5 top / 5 bottom layers |
| Wall generator | Classic |
Gallery
Power in the base
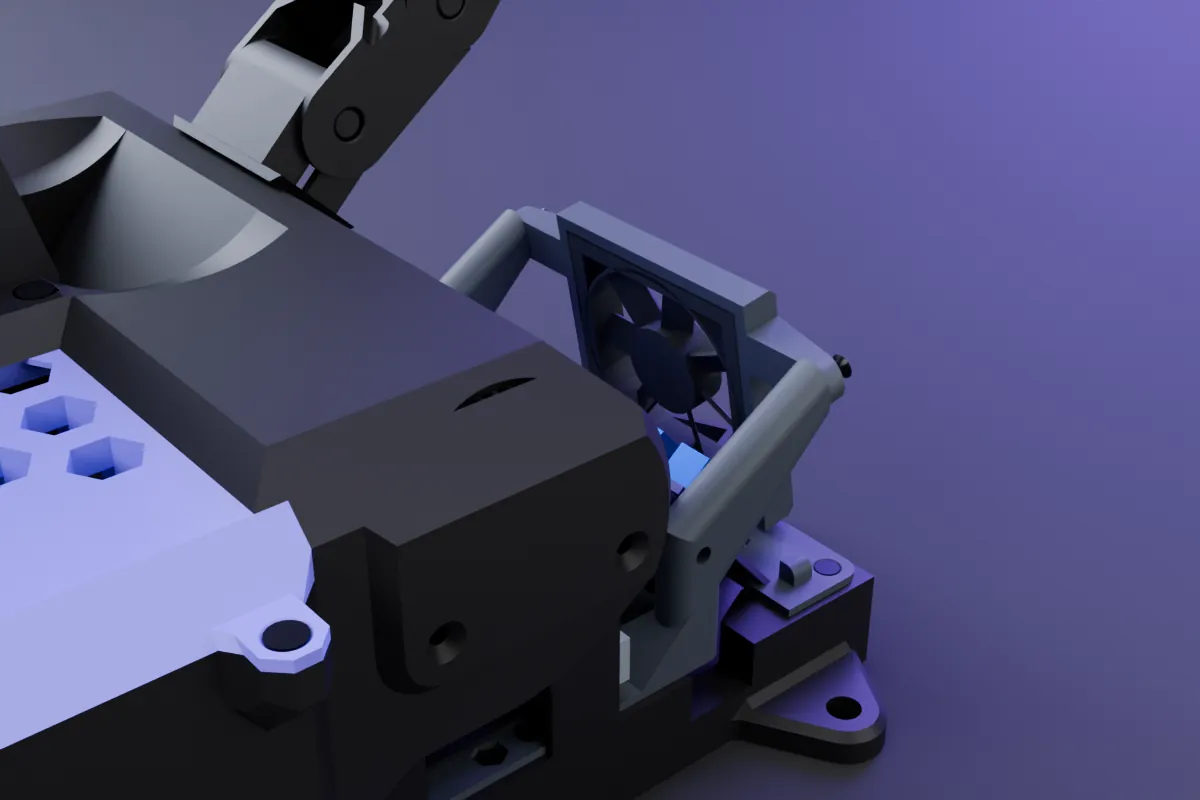
The supply sits in an internal bay (50 × 205 × 23 mm), or you can use an external supply. The power switch in the base switches the supply input, and the 60 mm fan runs whenever main power is on, blowing across the drivers.
Files and documentation
More SpaceDragon projects
Join the SpaceDragon community
Follow development, ask questions, share your builds and help shape the next projects.